本次我们要讲的内容是使用U盘为物理机安装Ubuntu操作系统,本次我们使用的镜像版本为22.04 LTSC版本。之前我已经产生过安装使用较新版本的Ubuntu 24.04版本,但是在安装后我发现这个版本的系统没有左侧的Dock栏(Desktop版本,非Server)。这个22.04版本的安装一切顺利,所以本次就以该版本的安装作为示范。
在安装之前你需要准备一个容量大于8Gb的U盘,还需要下载Ubuntu的ISO镜像,以及一个烧录软件。
注意:Ubuntu桌面端是带有GUI界面的操作系统,也就是可以使用鼠标点击进行操作,界面类似于Windows的版本。
server版本是只有黑框的终端版本,不能使用鼠标进行图形操作,建议新手从桌面端开始使用。U盘在制作过程中会被格式化,如有重要数据请注意提前备份!!!
| **Ubuntu iSO: ** | |
|---|---|
| https://releases.ubuntu.com/ | (桌面端和服务器端旧版本) |
| https://ubuntu.com/download/desktop | (桌面端新版本(近两代)) |
| https://ubuntu.com/download/server | (服务器端新版本) |
- **Rufus: **
https://rufus.ie/zh/ (推荐下载便携版(portable))
启动盘制作
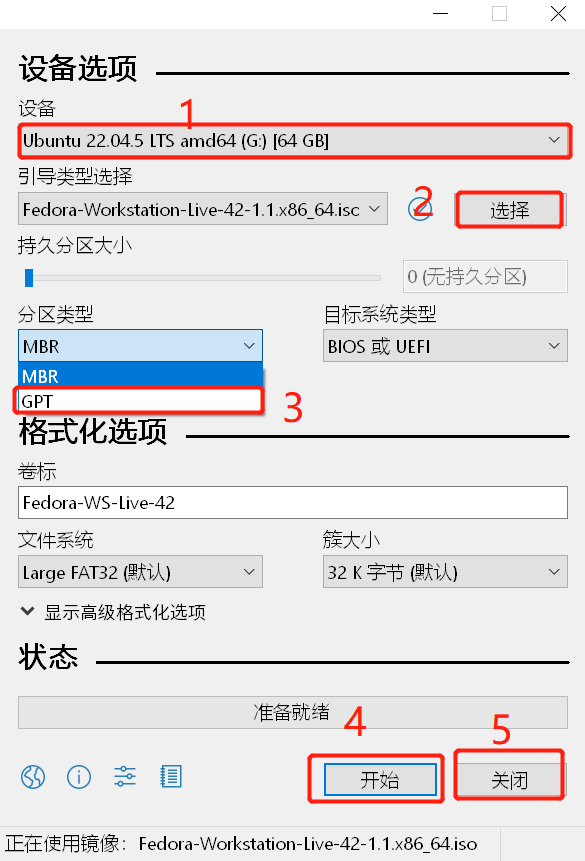
- 在另一台电脑下载安装Rufus下载Ubuntu的ISO镜像文件,打开Rufus,烧录镜像

1.1 首先查看识别到的U盘是不是你要制作引导的U盘
1.2 ** 选择导入之前已经下载好的Ubuntu iSO镜像文件**
1.3 将分区类型修改为GPT
1.4 点击开始即可进行烧录
1.5 等待进度条走完之后,点击关闭按钮
1.6 弹出U盘备用
代理地址
此项可以直接跳过,按enter继续
软件源设置
可选软件源
在安装过程中系统会推荐合适的软件源,当然,你也可以执行设置。推荐的地址如下:
中科大软件源:
1 | https://mirrors.ustc.edu.cn/ubuntu/ |
清华源
1 | https://mirrors.tuna.tsinghua.edu.cn/ubuntu/ |
阿里源
1 | https://mirrors.aliyun.com/ubuntu/ |
#####################################################################
sources.list文件修改
假如后面因为软件源的原因无法正常使用apt安装软件,请修改以下位置的文件
1 | /etc/apt/sources.list |
使用Vim或其它编辑器修改这个文件为上面推荐的某一个(Vim编辑器可能在系统刚安装后没有内置,这时候你可以使用命令apt install vim来安装,或者使用Vi或者nano等进行修改替换),需要修改的对象为:
1 | http://cn.archive.ubuntu.com/ubuntu/ |
这个东西。
在旧版的Ubuntu中,需要修改很多处,但是在24版及以后的新版本中,只有一项是需要修改的,根据实际情况修改替换
我的旧版本内容如下:
1 | deb http://cn.archive.ubuntu.com/ubuntu/ jammy main restricted |
此时需要对此处http://cn.archive.ubuntu.com/ubuntu/进行替换,将其修改为适合自己的源。
进入引导界面
在启动盘已经做好的前提下,插入需要安装Ubuntu的电脑USB口,准备启动电脑。在电脑未完全启动之前,也就是还未开机之前,请根据提示进入BIOS(我这里使用的是技嘉的服务器,按del进入BIOS,按F10进入高级启动),你可以在BIOS中修改第一启动项为U盘,随后即可进入到安装界面。
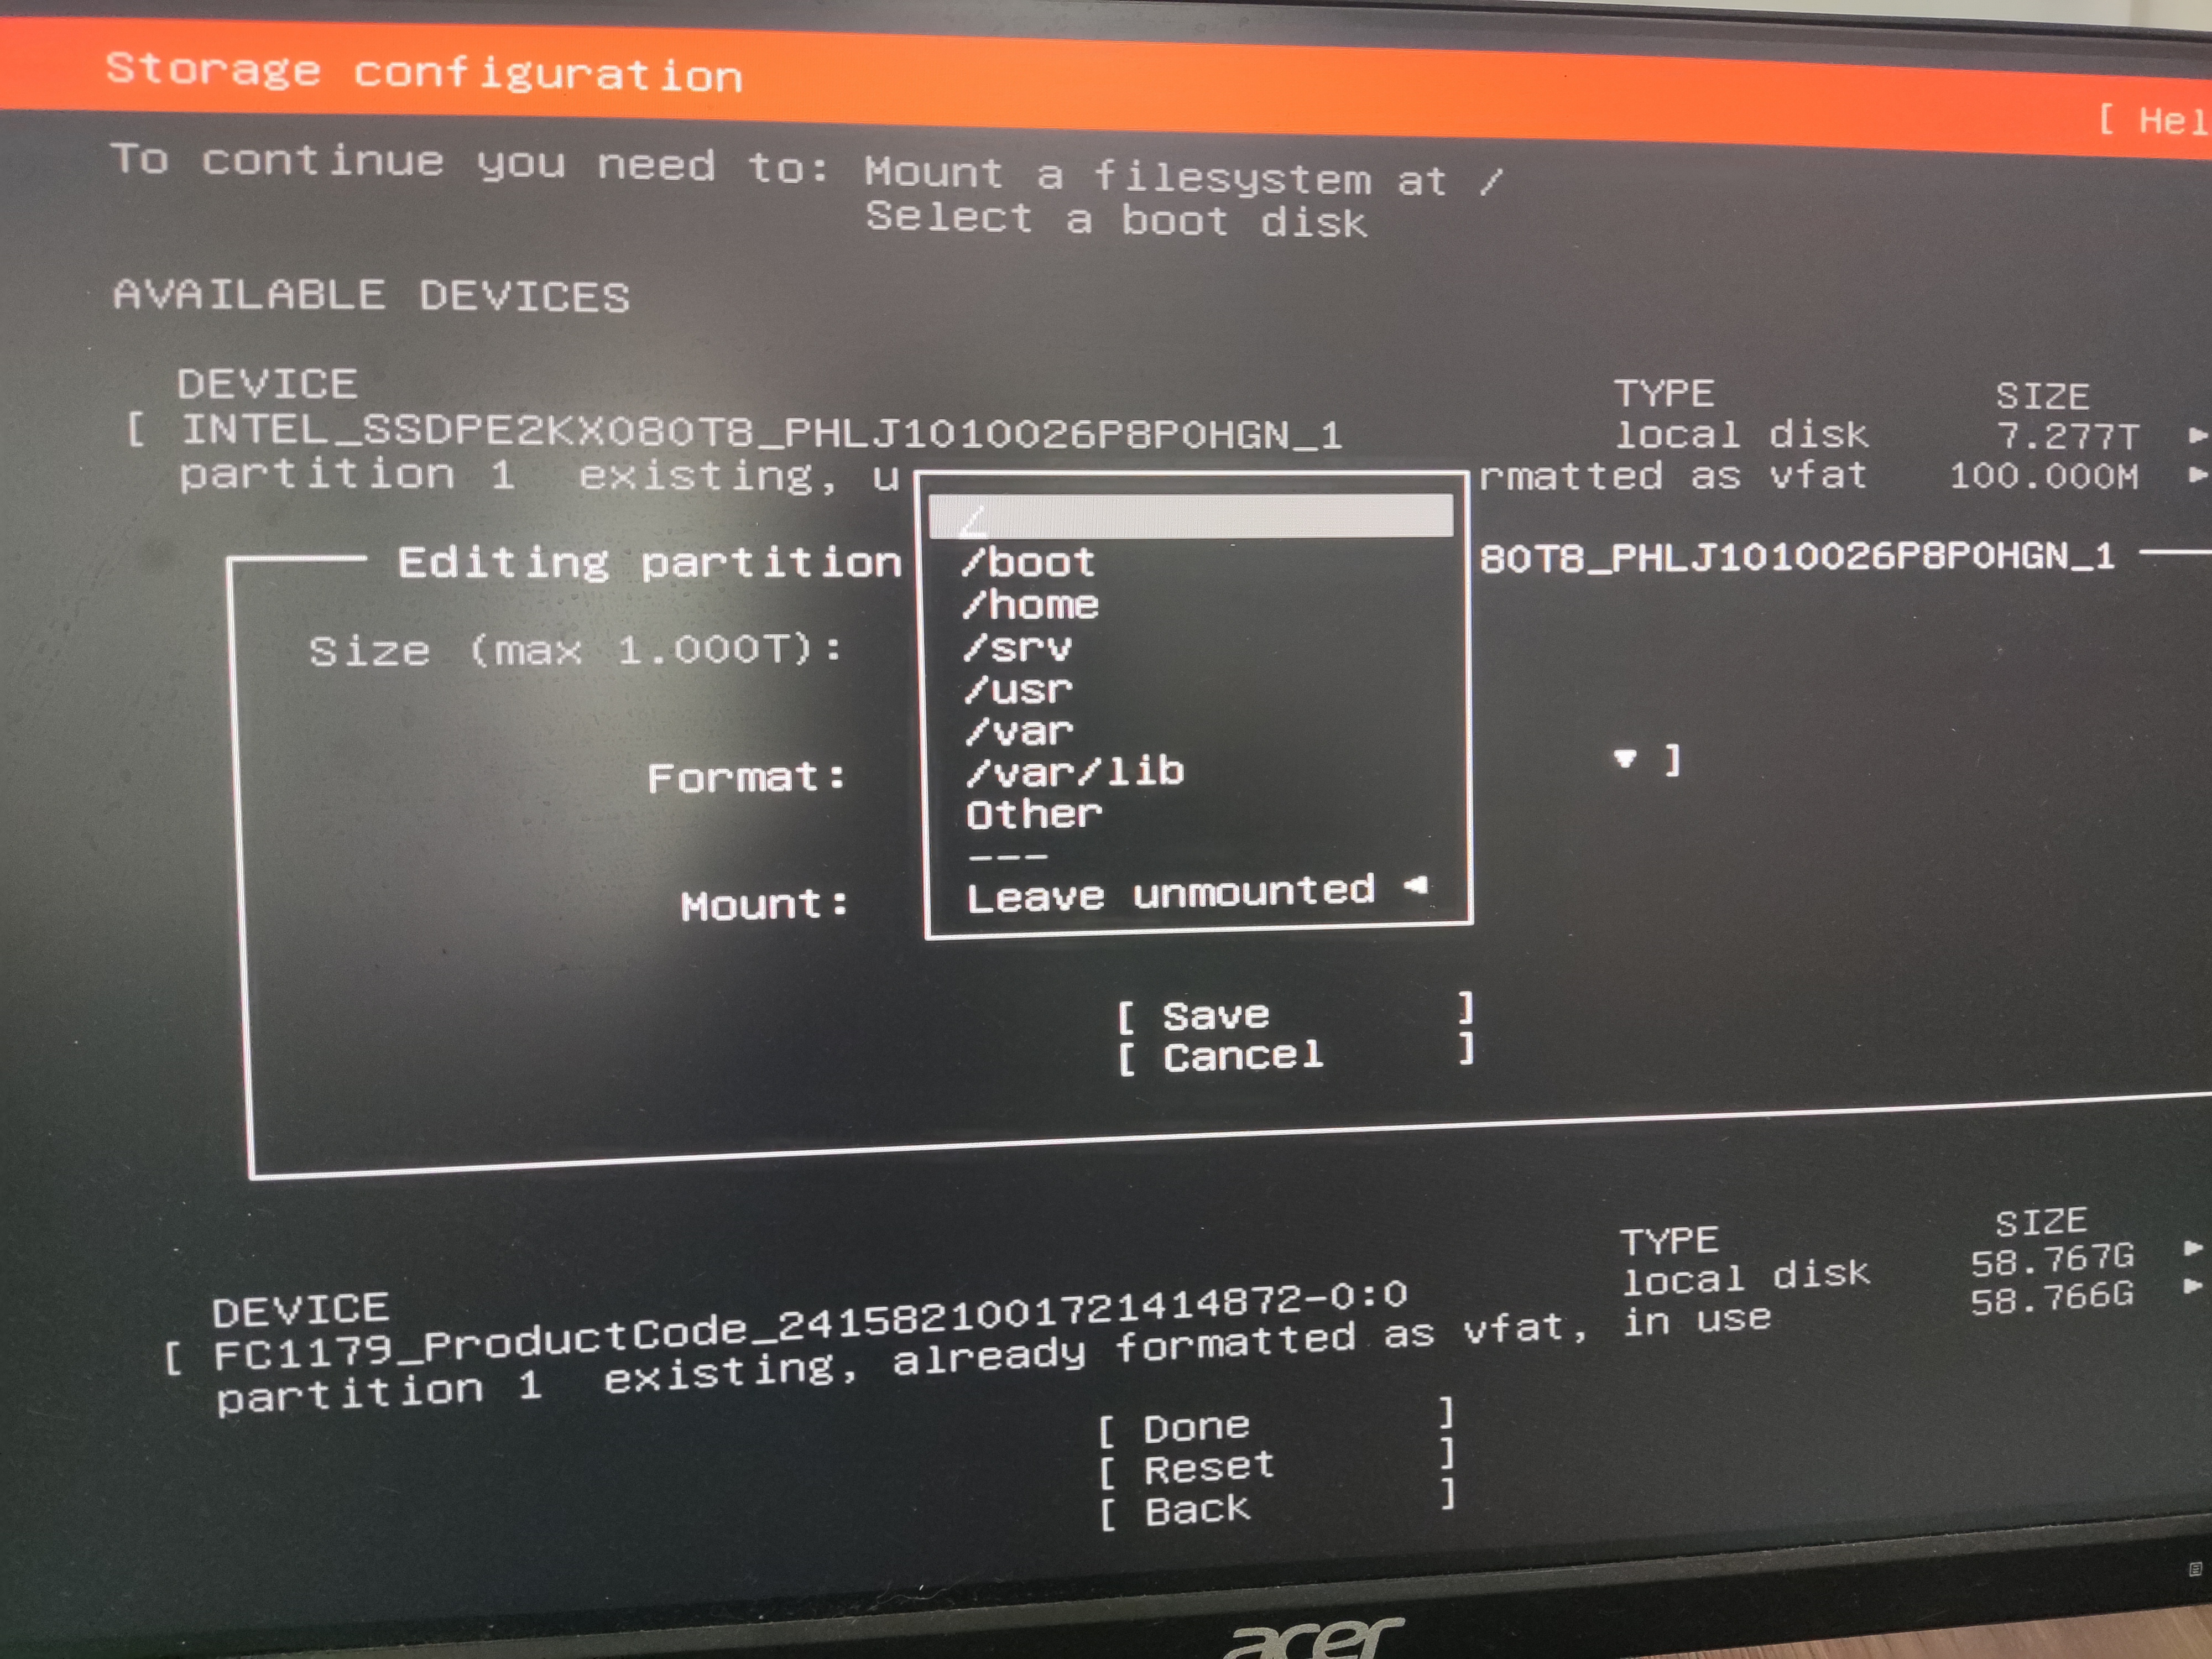
根据提示输入自己的用户名,计算机名以及密码,在进行安装位置设置的时候要注意:
安装时不要使用前两项安装选择,不能使用整块磁盘安装,选择使用Custom或者自定义安装,在此处可以自行设置安装位置,且,格式化磁盘时必须选择使用ext4格式进行格式化,在选择挂载位置的时候,选择挂载/,也就是根目录。

其他分区将会同意挂载在同一个分区,可以避免多个分区设置的麻烦。坏处是,系统坏了无法自救,请斟酌考虑。
进入系统

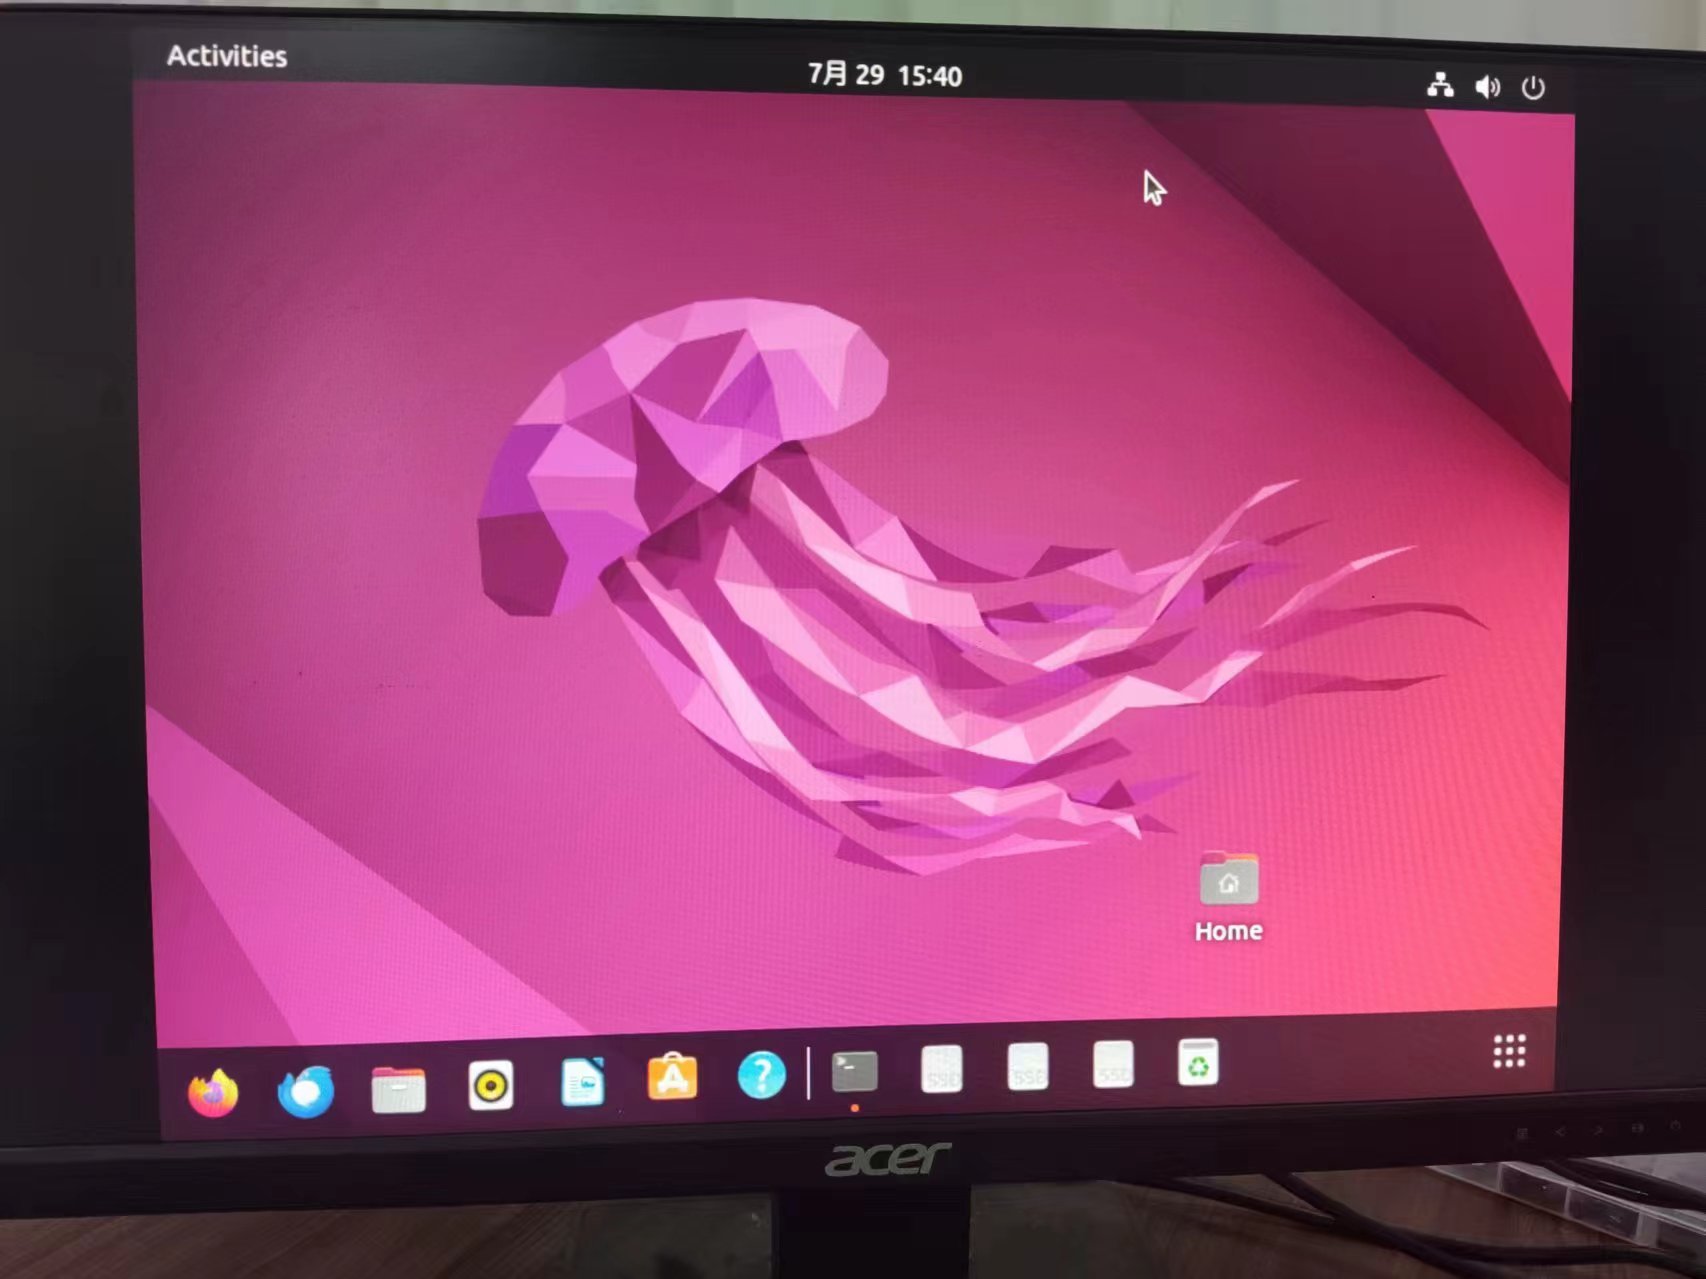
如图所示,你的Dock栏大概率在左侧,这个是可以调的